Converting accounts or contacts back to leads in Salesforce can be a challenging process as it goes against the standard Salesforce data model. That’s why ENWAY has developed its own Blink app. In this article, I will show you how to convert contacts and accounts to leads again using the Blink app.
Why Do You Need to Convert Accounts or Contacts to Leads in Salesforce?
There may be several reasons why you may need to move existing records back to leads in Salesforce.
Here are a few examples:
- Qualification: You may have initially converted a lead to an account or contact prematurely, without fully qualifying them. Converting them back to a lead can help you re-evaluate their potential and determine if they are worth pursuing as a customer.
- Re-engagement: Sometimes, the contact may have gone cold, and you may not have had any interaction with them for a long time. In such cases, converting them to a lead can help you re-engage with them and start fresh.
What is Blink?
Blink was built to help companies speed up their sales process with single and multiple lead conversions.
With Blink, you can:
- Do mass lead conversion of up to 200 records
- Convert leads in Flow for no-code automation
- Convert accounts and contacts back to leads
- Use custom objects and record type mapping
- And many more.
You can buy and download Blink via the AppExchange marketplace. A free 14-day trial is available.
How to Convert Accounts and Contacts to the Lead in Salesforce?
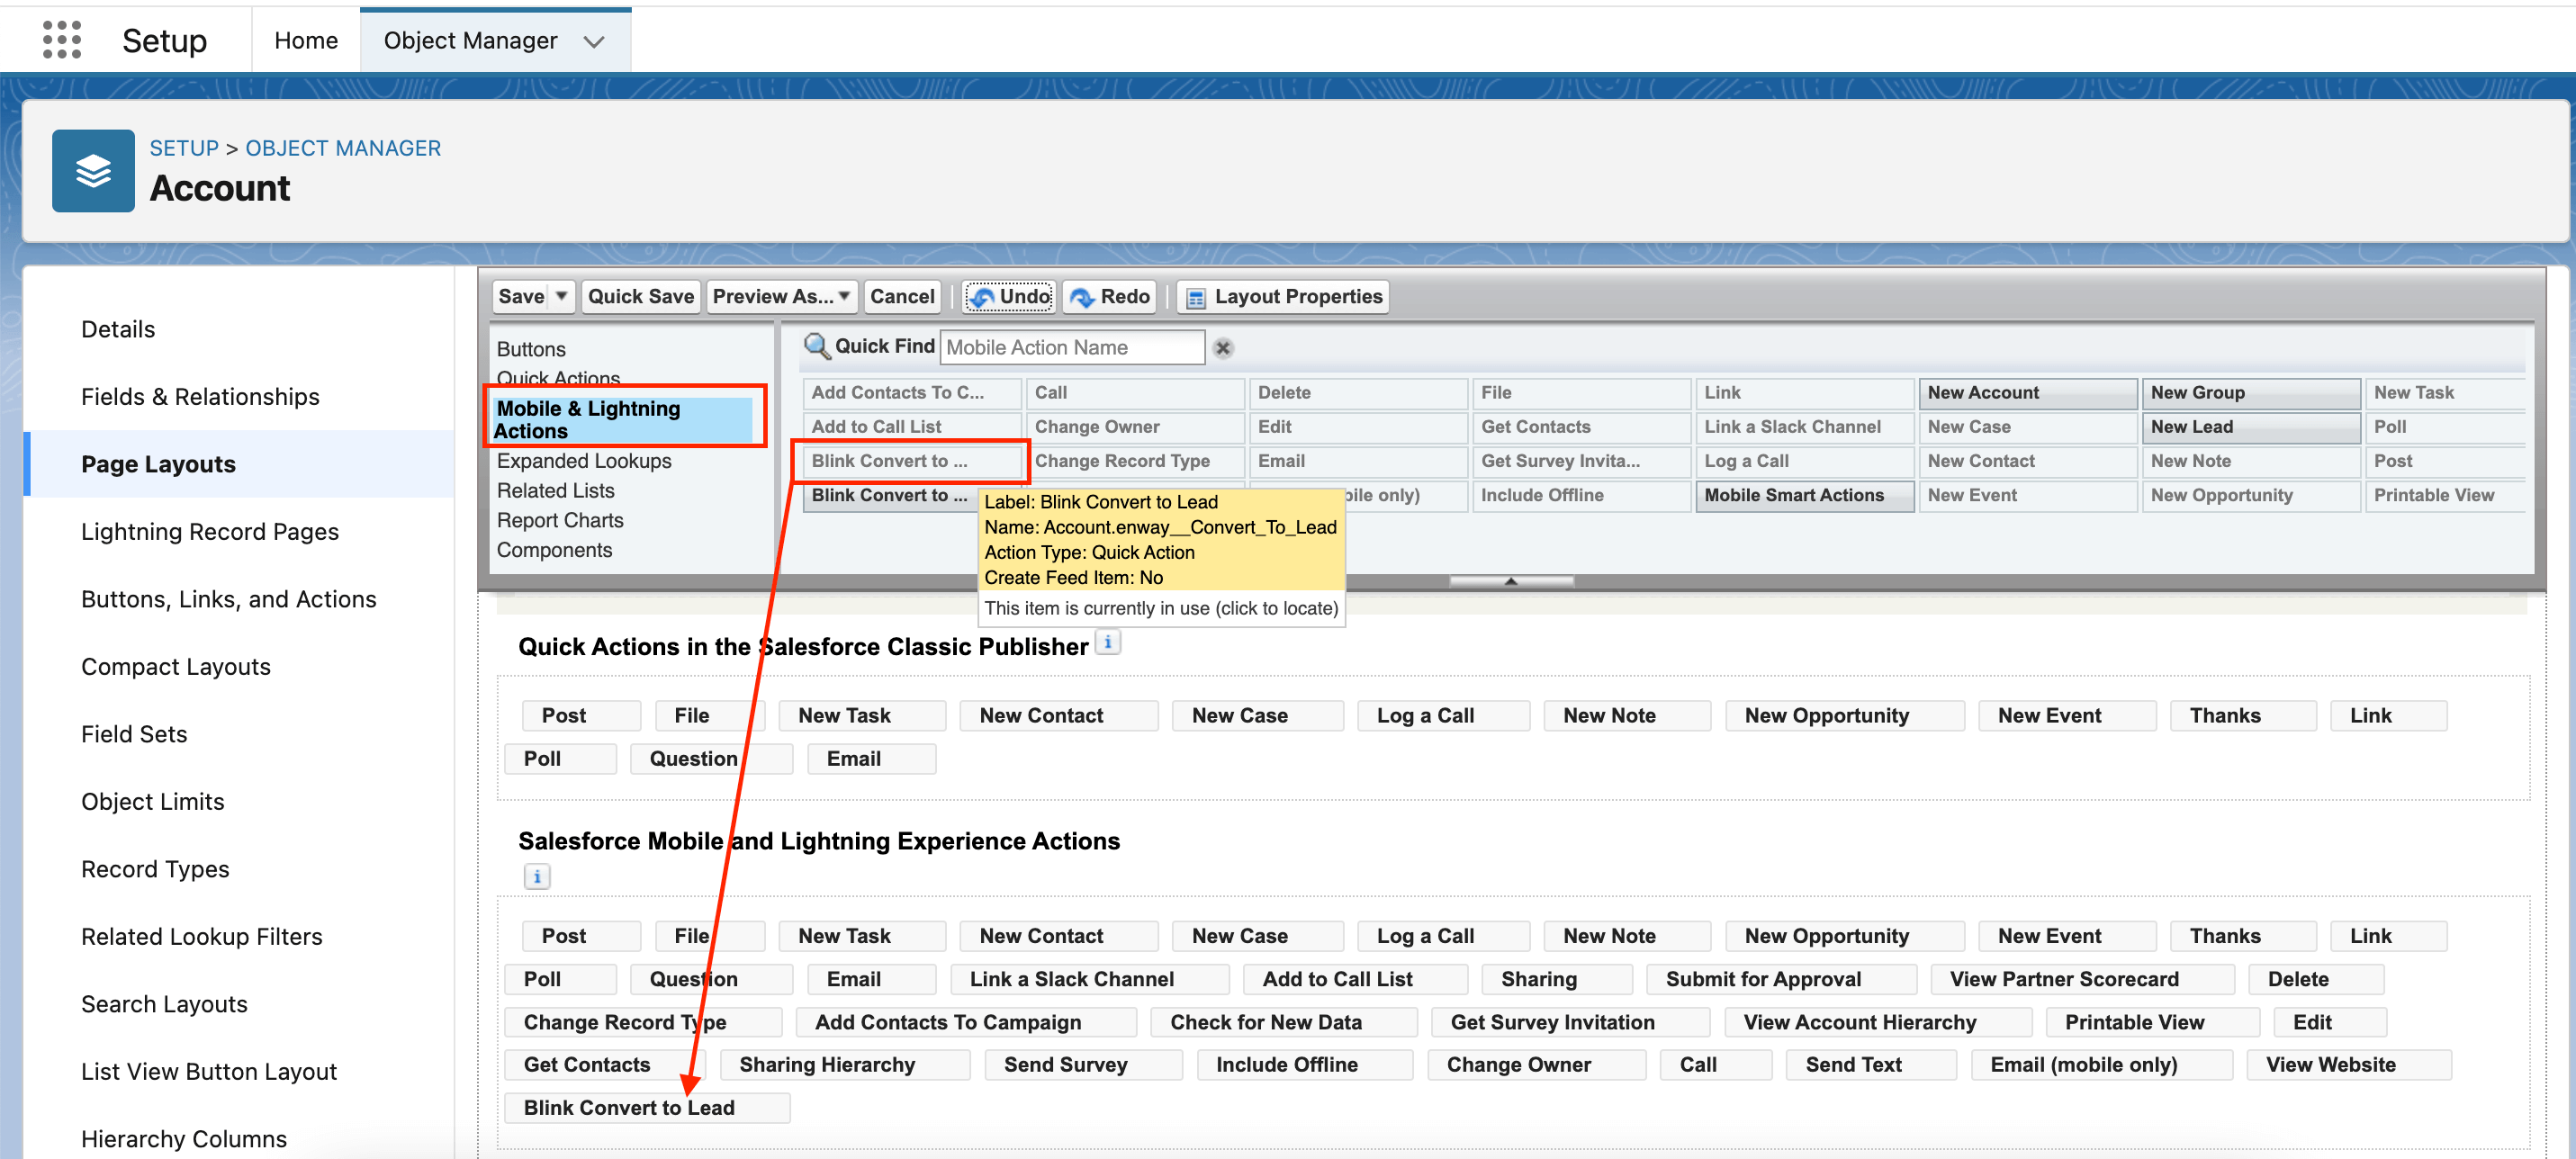
For starters, we open Setup > Object Manager > Account > Page Layouts. Then we select the necessary layout and click Edit.
After that, we drag and drop the Blink Convert to Lead button to the Salesforce Mobile and Lightning Experience Actions section. Select Blink Convert to Lead (Classic) if you use the Classic Salesforce interface.
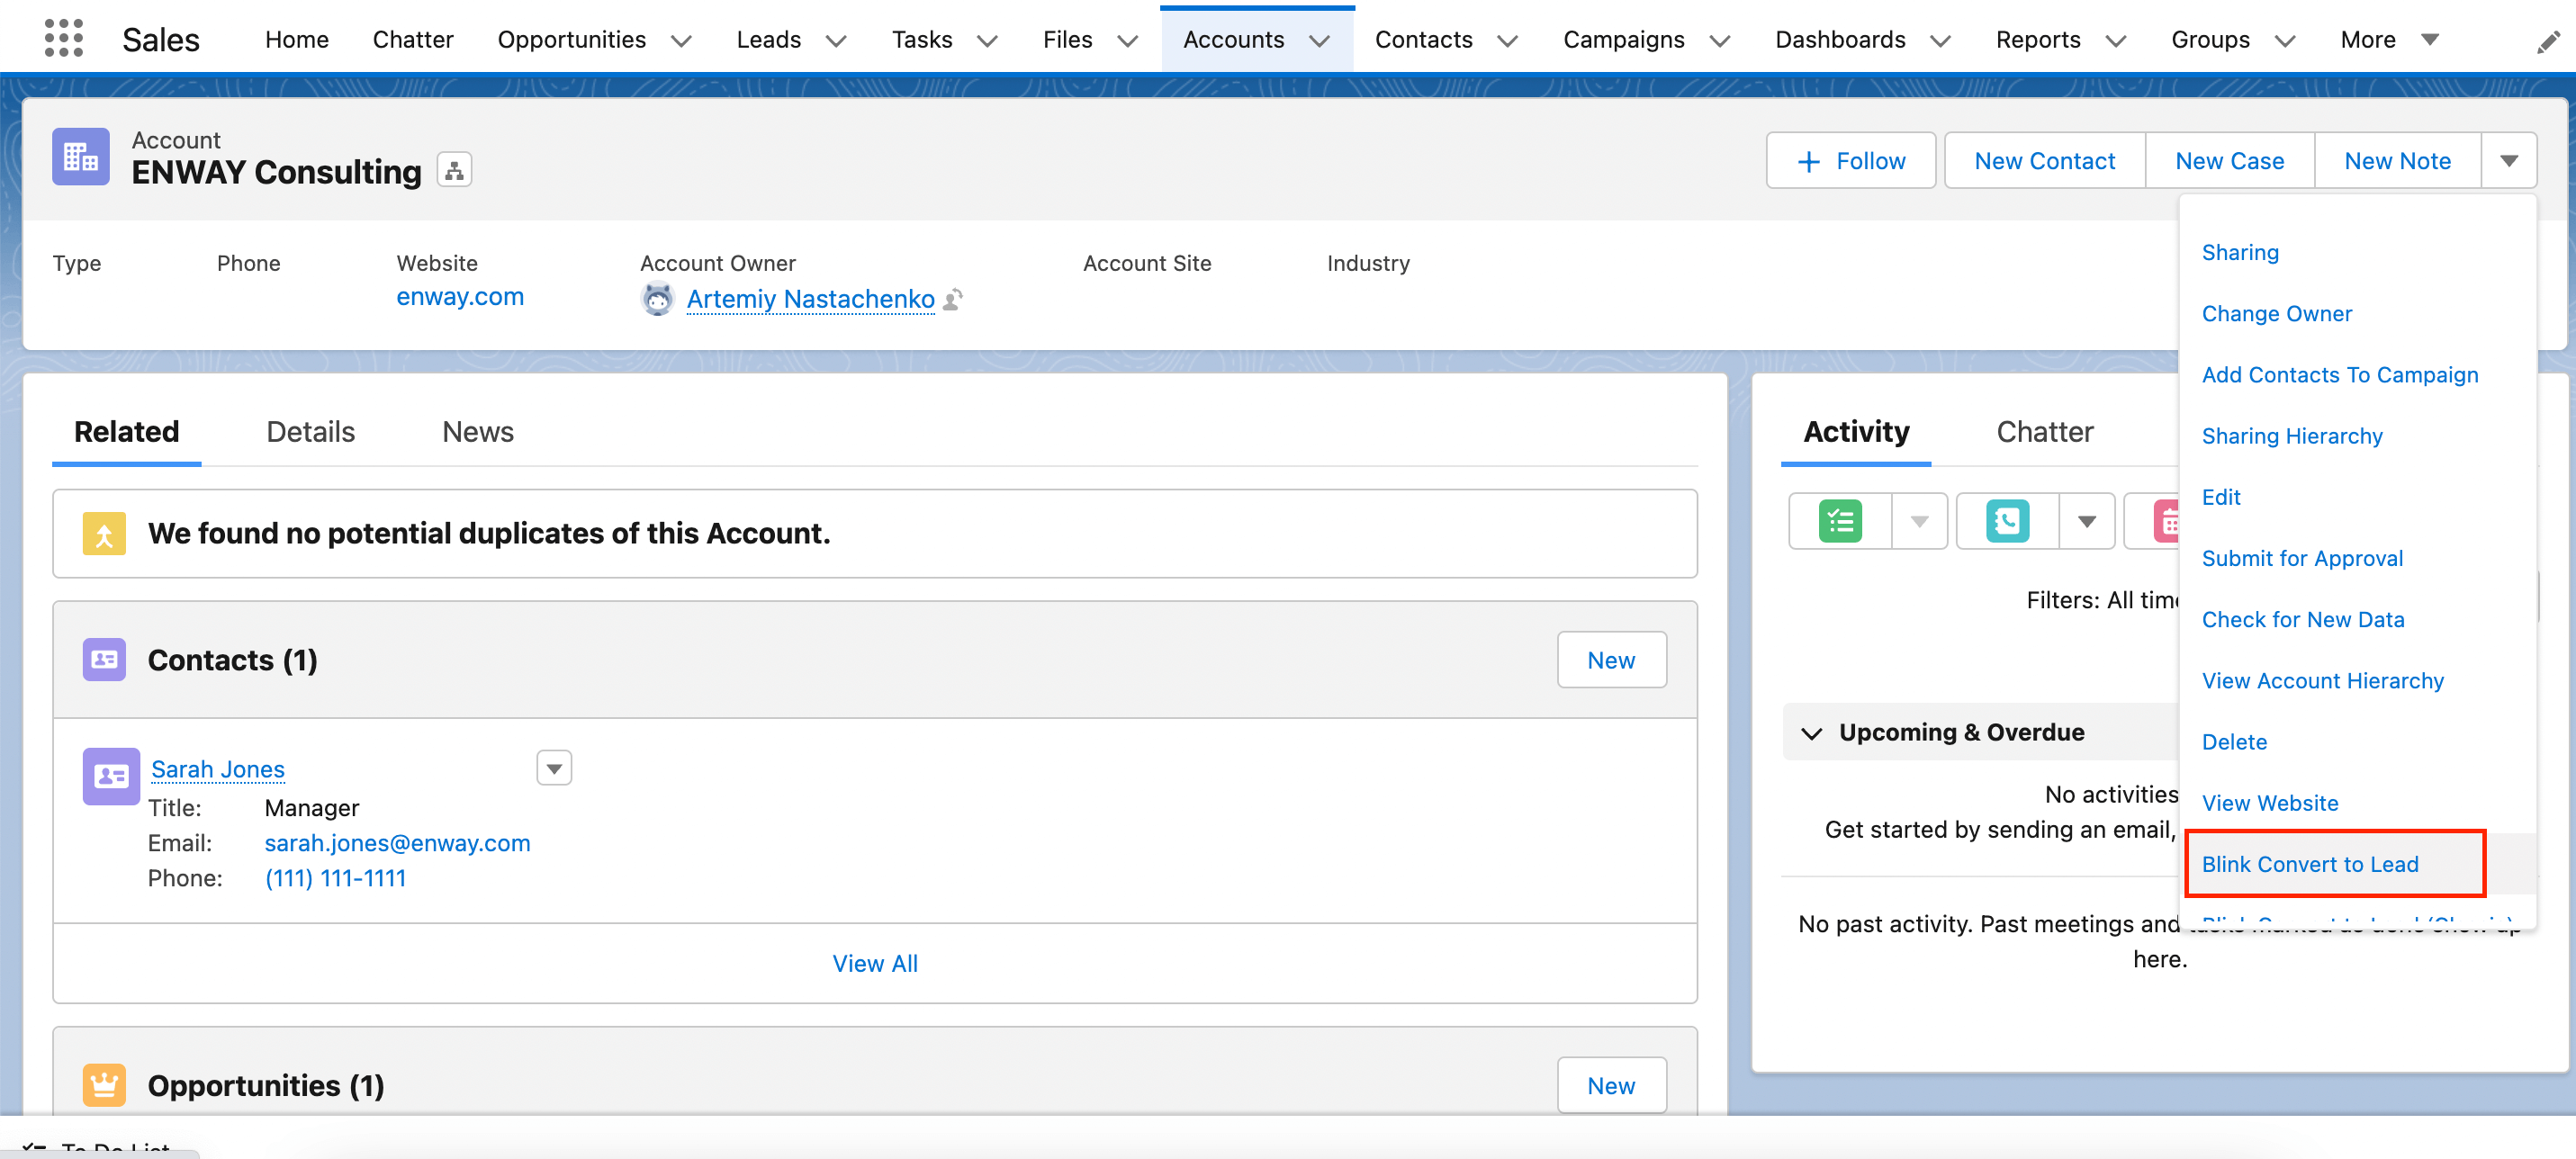
Now let’s open the particular Account record and click Blink Convert to Lead.
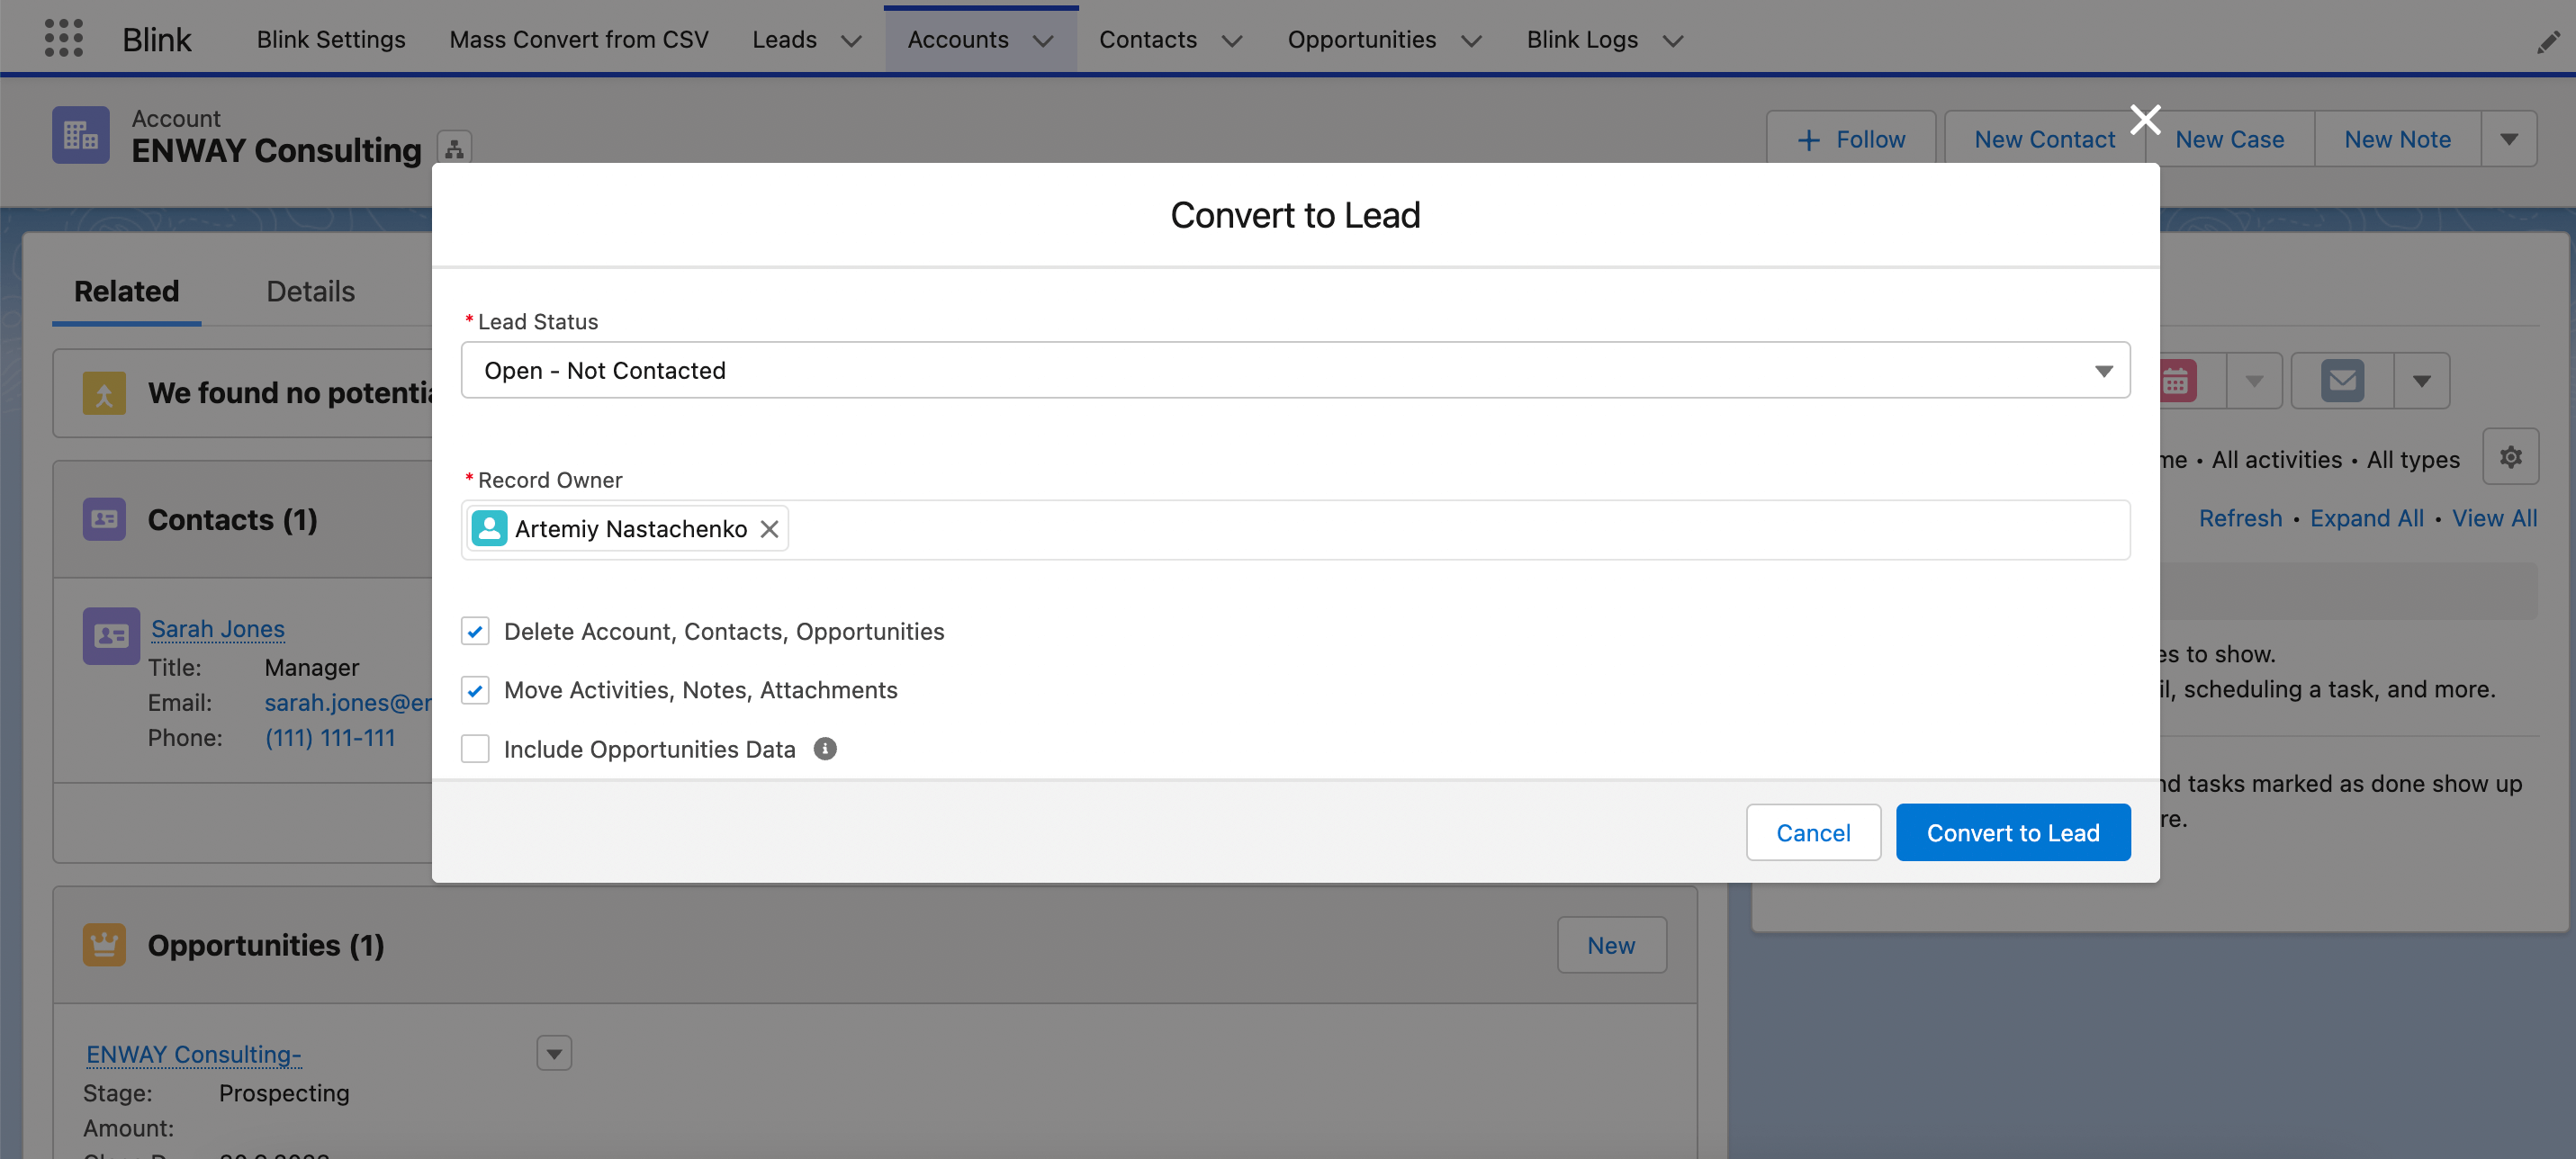
Then we choose the required Lead Status, record owner, and tick checkboxes.
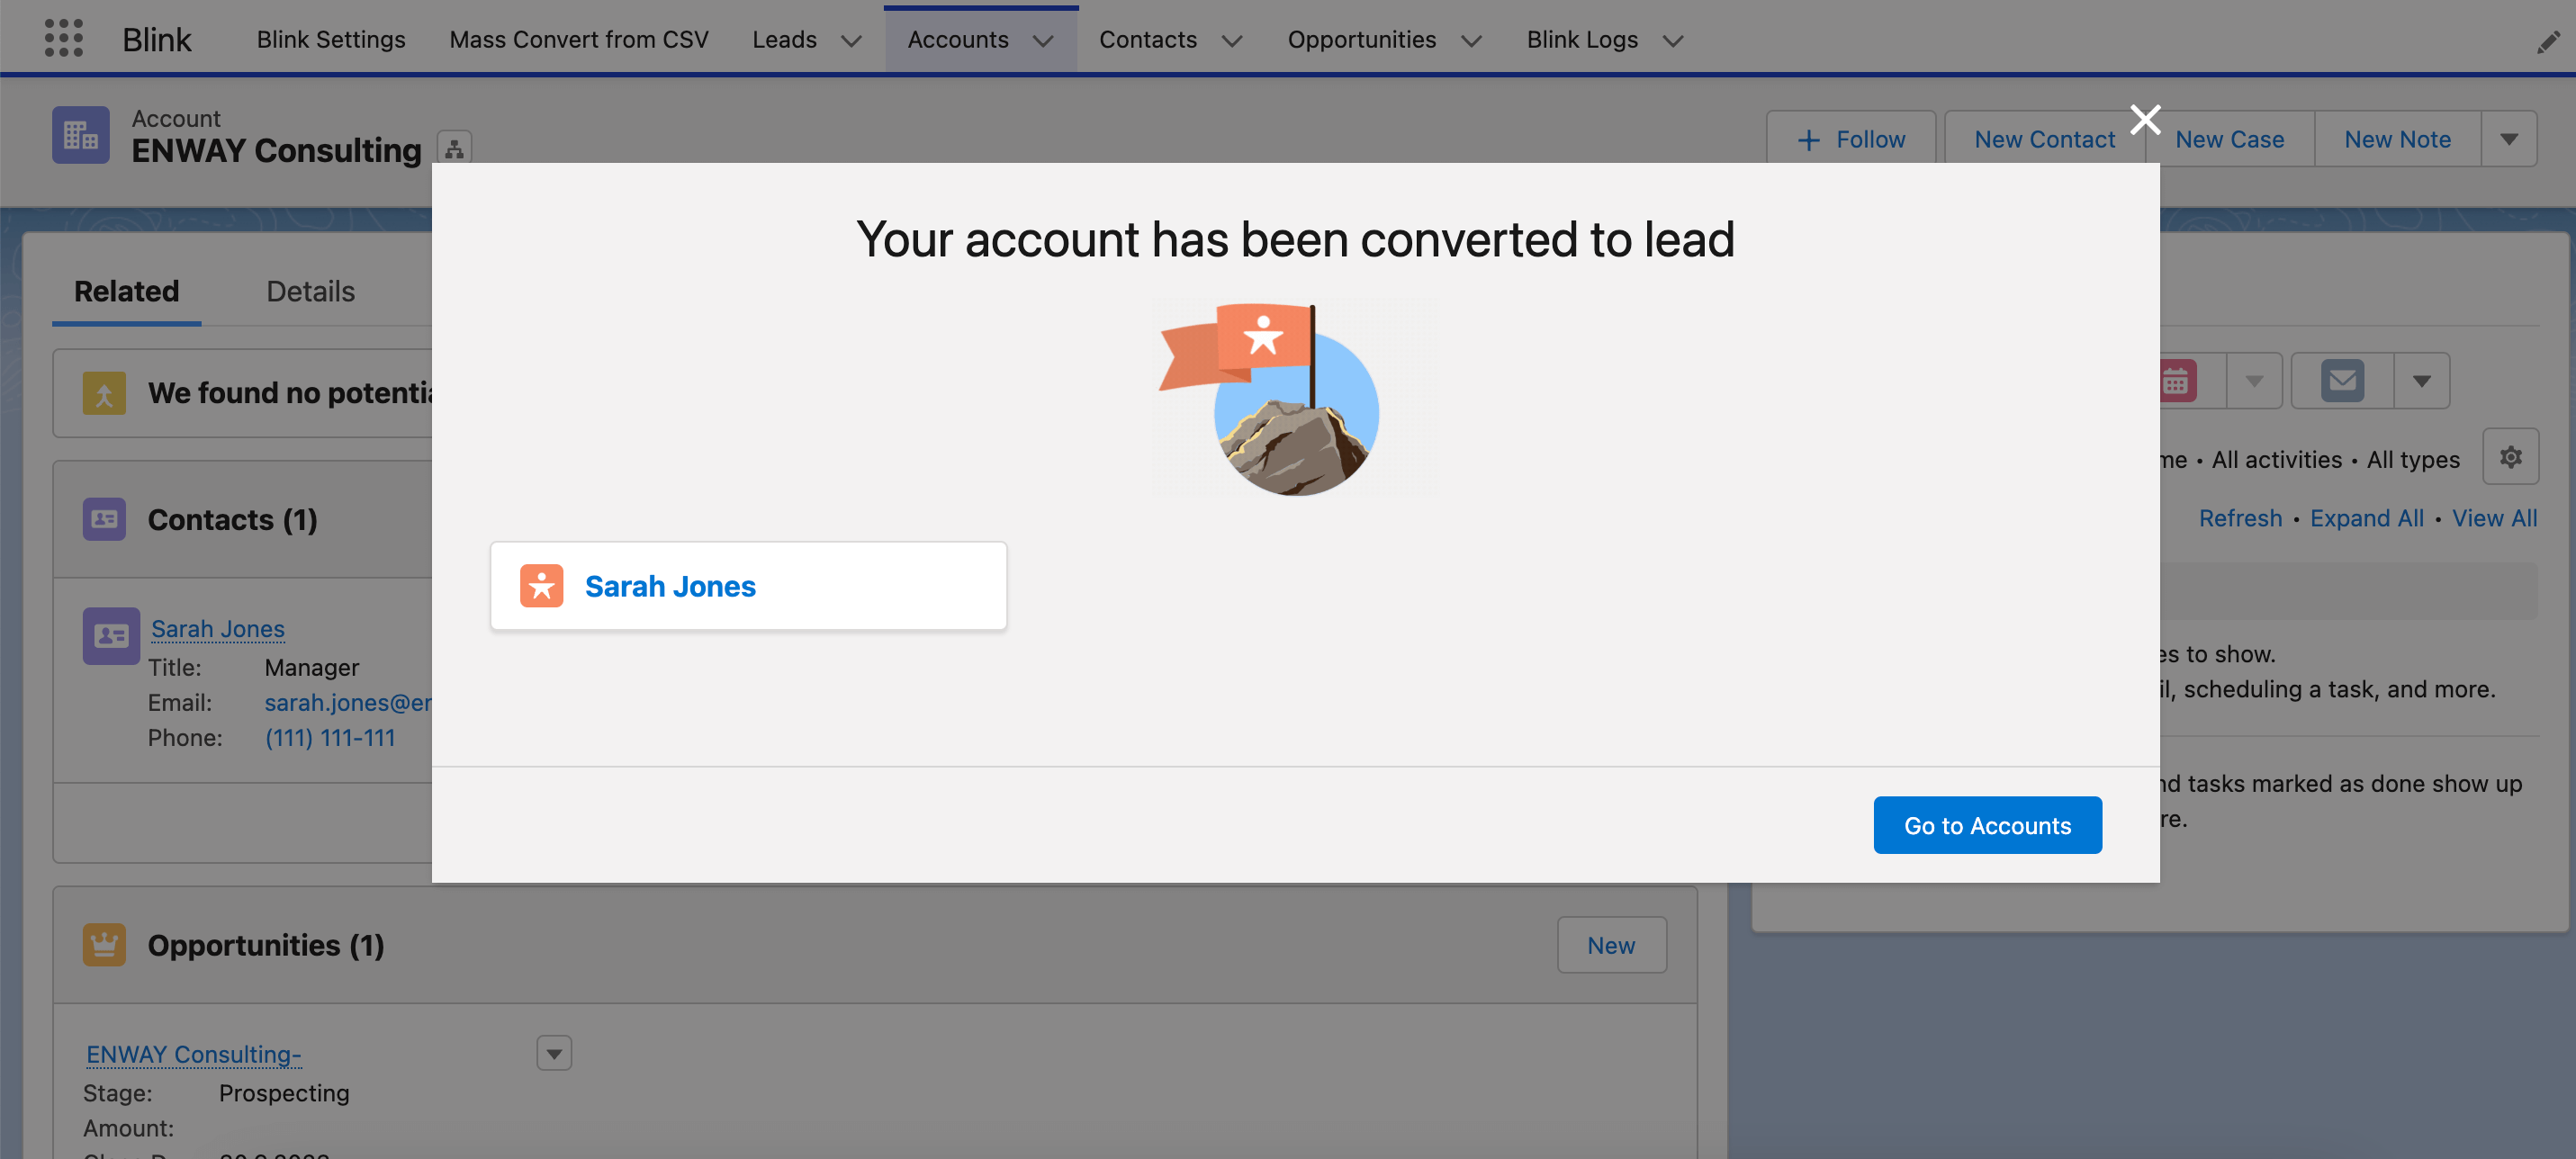
Click Convert to Lead. Wonderful!
How to Mass Convert Accounts and Contacts to Leads in Salesforce?
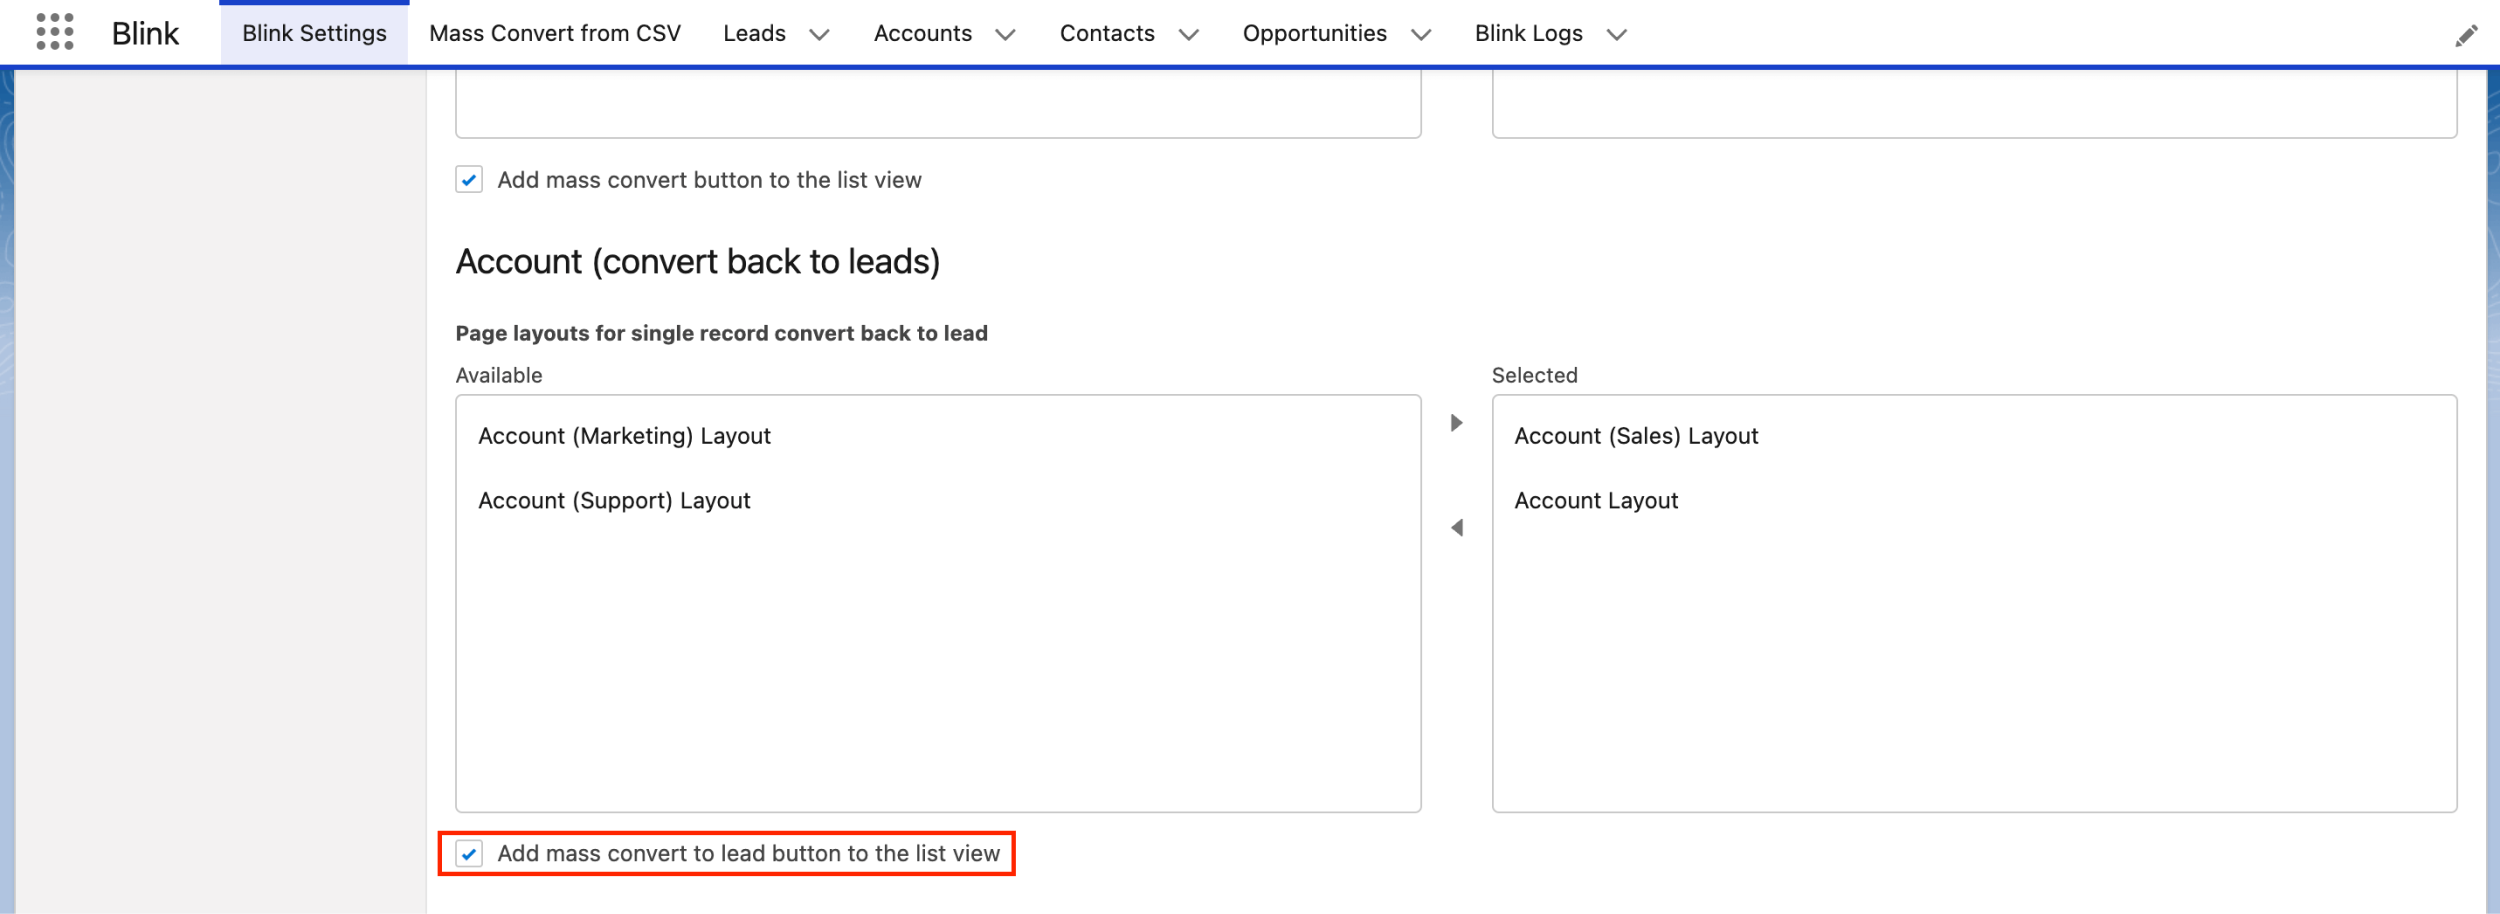
Firstly, we need to add the conversion button for Accounts list views. We open Blink Settings > Buttons. In the Account (convert back to leads) section, we select the checkbox “Add mass convert to lead button to the list view.
Afterwards, we return to the Accounts tab and select the records we need to convert. Click Blink Convert All to Leads.
Then we tick the needed checkboxes and select Lead Status.
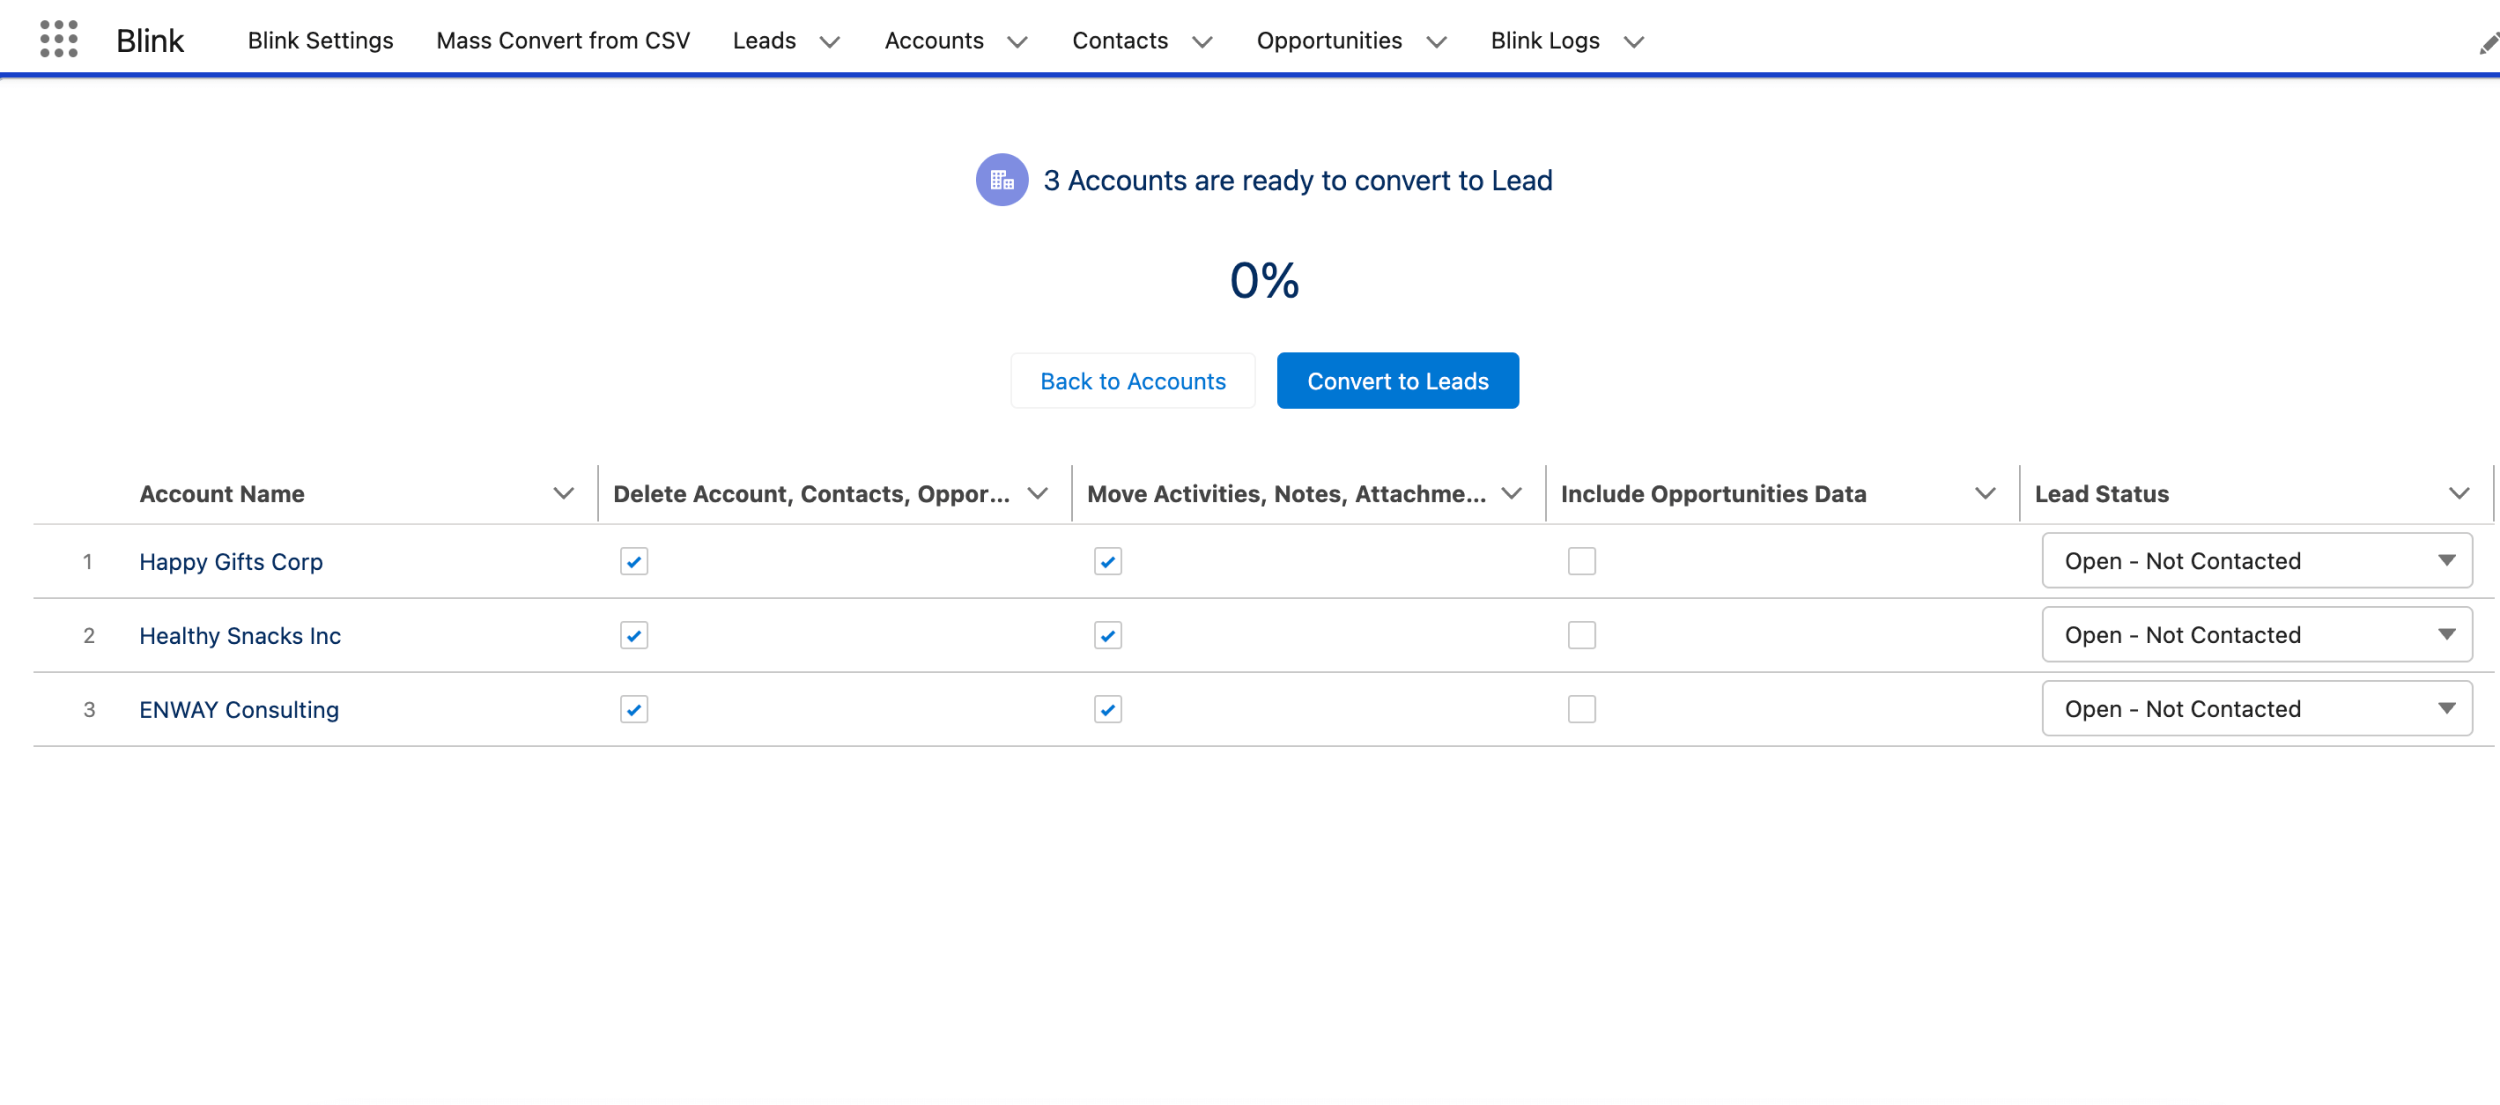
Checkboxes tips:
- Delete contact – delete the existing contact after conversion
- Move Activities, Notes, Attachments – if there are activities, notes, and attachments, the app will move them into the new lead.
- Include Opportunities Data – populate lead information based on the standard Lead-Opportunity mapping from filled-out Opportunities fields sorted by created date (newest first).
Finally, we click Convert to Leads. Well done!

How to Convert Contacts back to Leads?
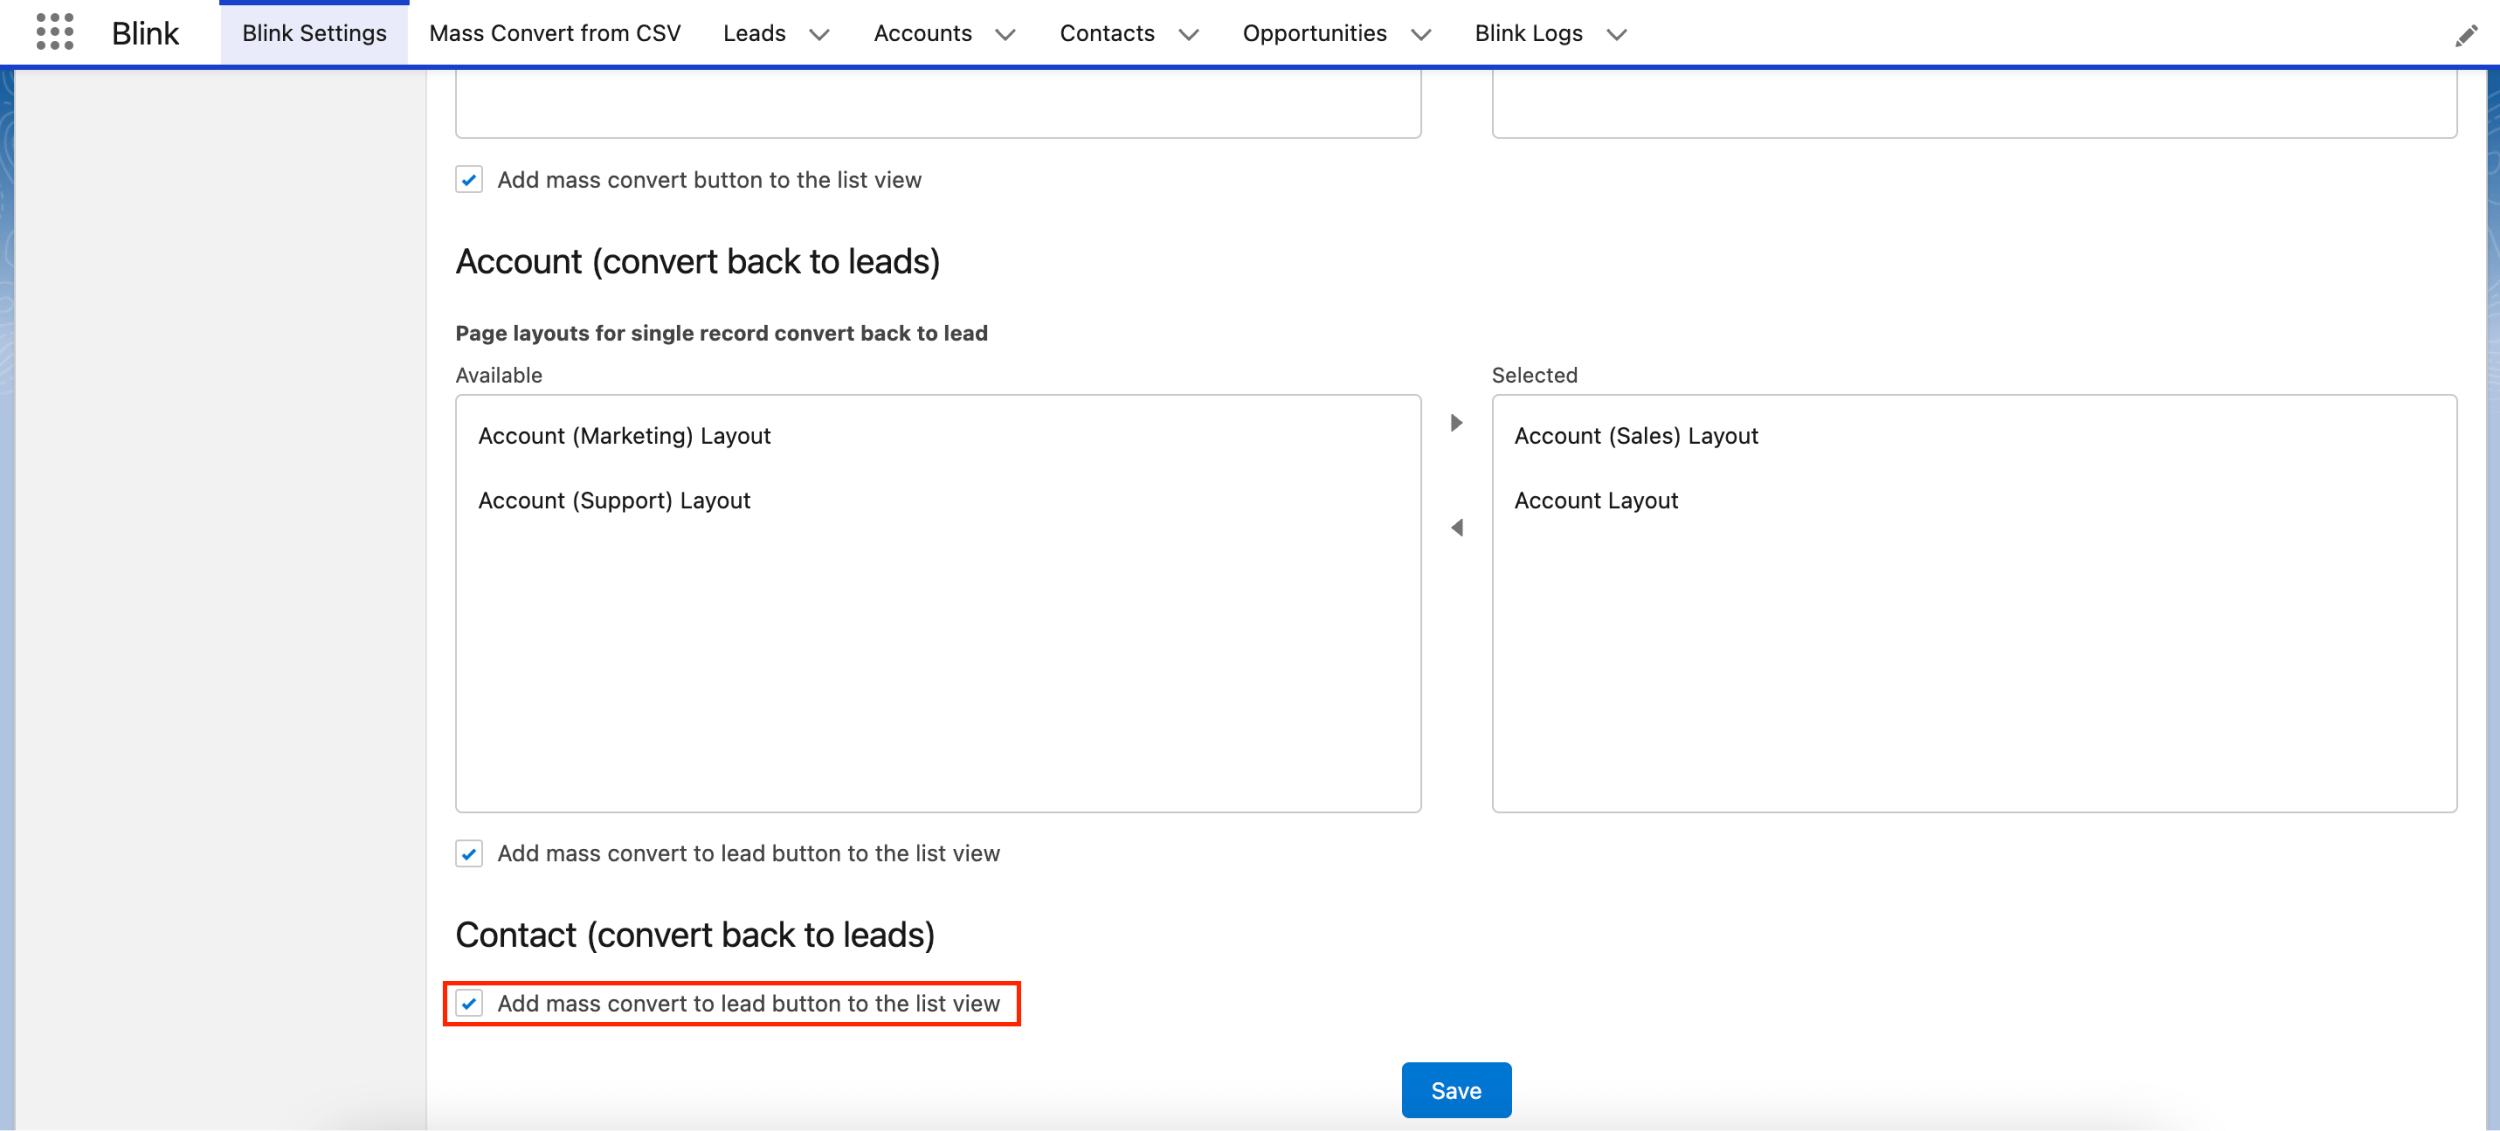
Now, let’s convert Contacts back to Leads. Firstly, we open Blink Settings > Buttons. In the Contact (convert back to leads) section, we select the checkbox Add mass convert to lead button to the list view. Don’t forget to save the changes.
Then we return to the Accounts tab and select the records we need to convert. And now we click Blink Convert All to Leads.
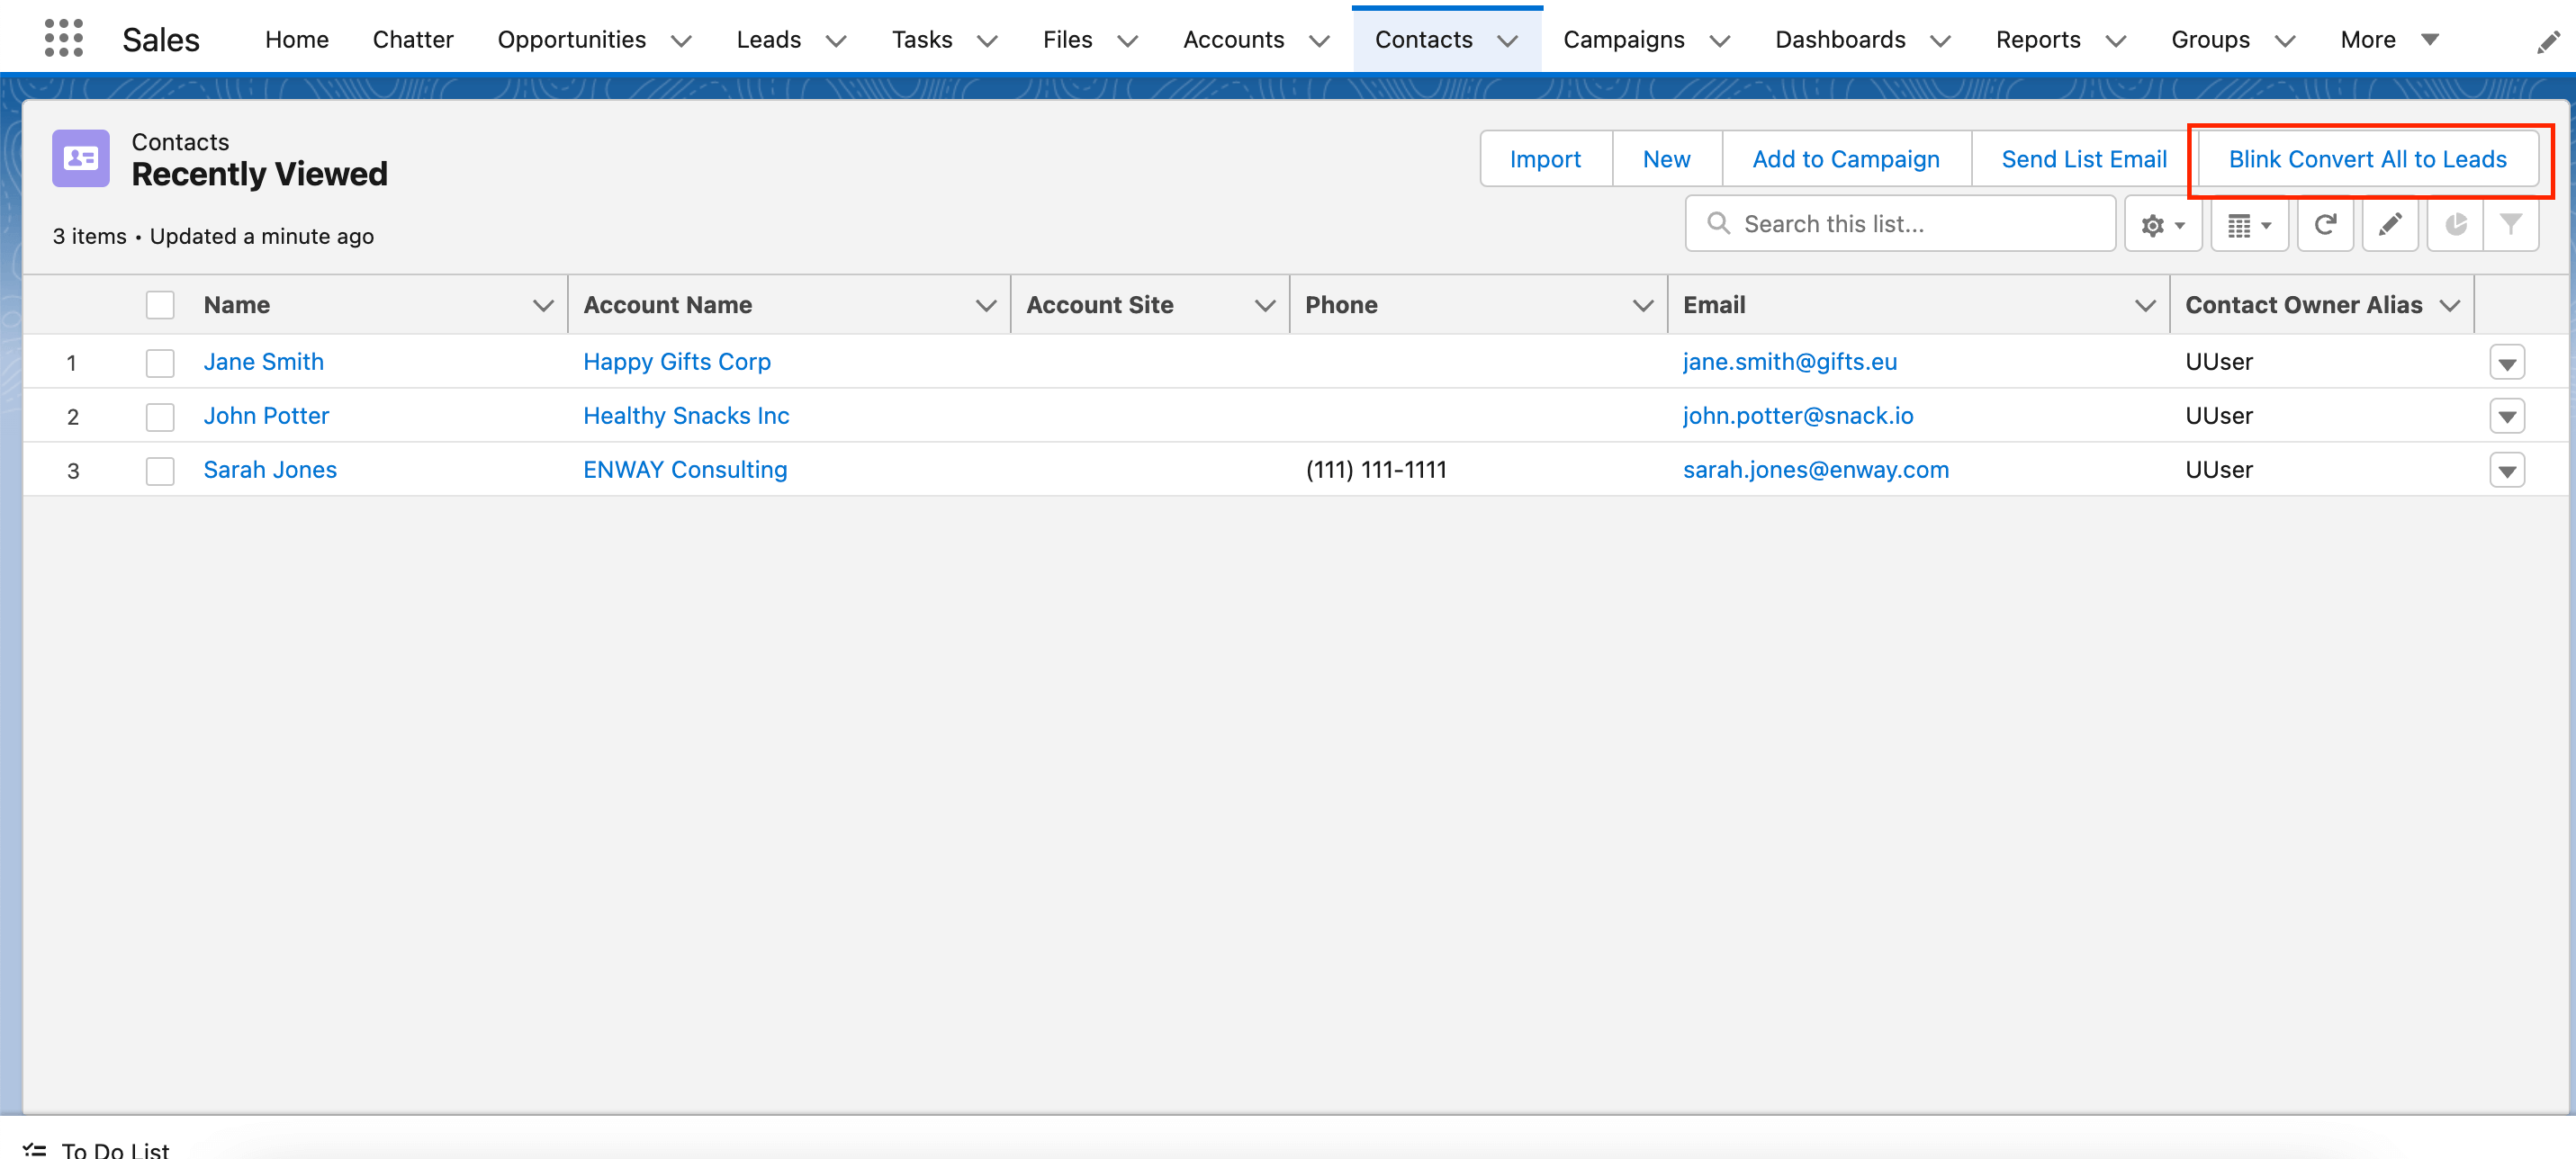
Then we tick the needed checkboxes and select Lead Status.
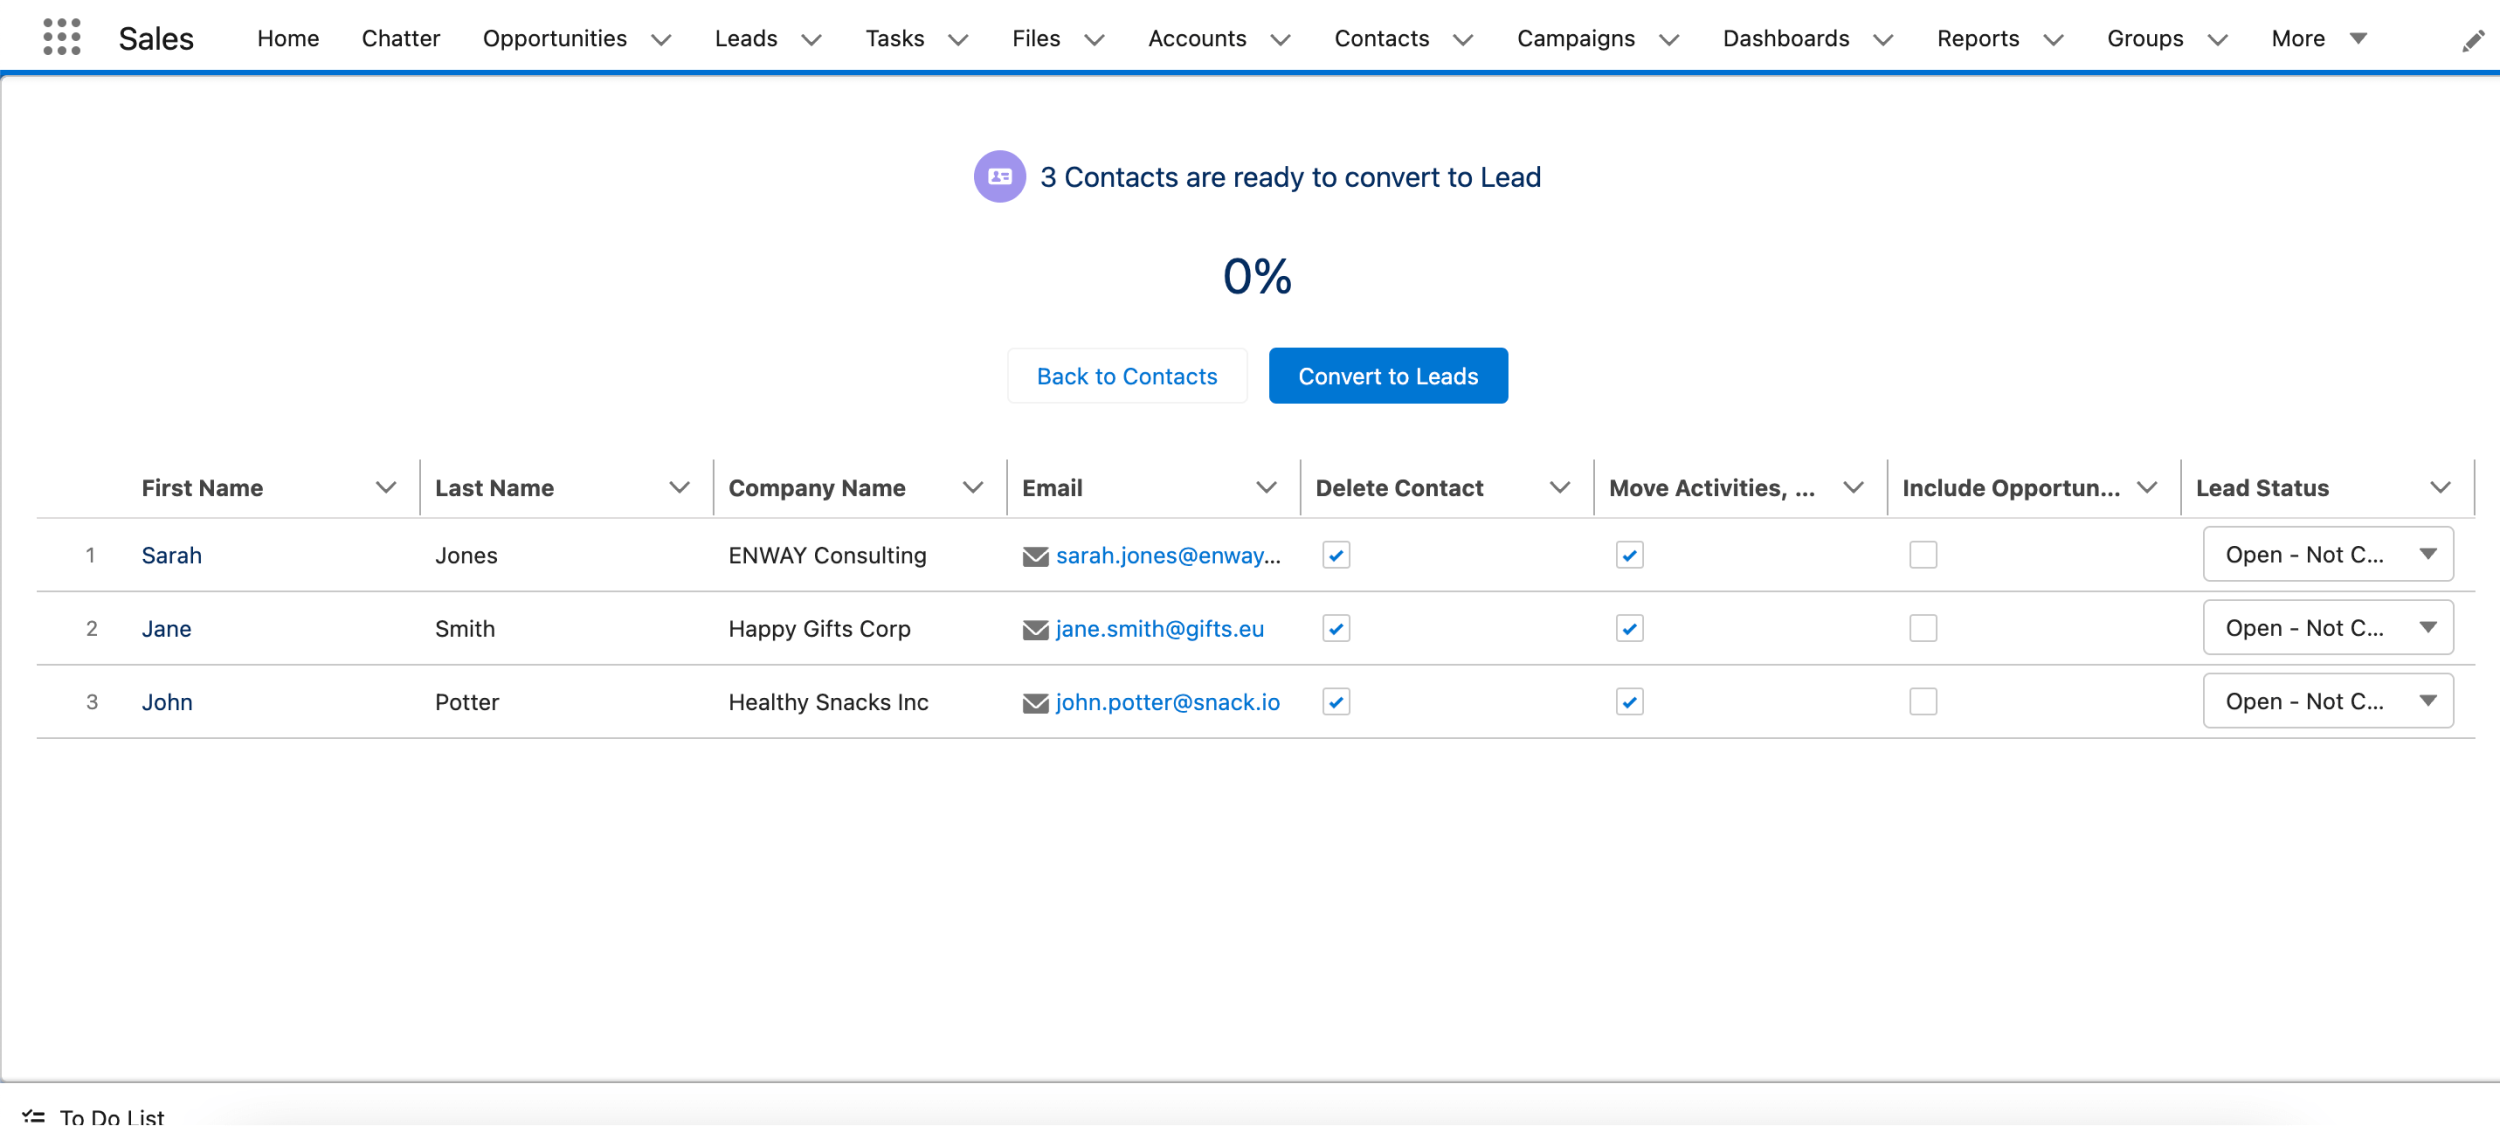
Checkboxes tips:
- Delete contact – delete the existing contact after conversion
- Move Activities, Notes, Attachments – if there are activities, notes, and attachments, the app will move them into the new lead.
- Include Opportunities Data – populate lead information based on the standard Lead-Opportunity mapping from filled-out Opportunities fields sorted by created date (newest first).
Finally, we click Convert to Leads. Success!


